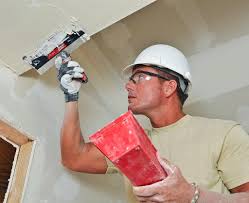
Drywall installation is a popular DIY project for homeowners because it’s easy to learn and doesn’t require any expensive specialty tools.
To begin installing drywall in your home, use the chart in the previous section to determine which kind of drywall you need for your project, then estimate how many sheets you’ll need based on the size of the area. Most home improvement stores will deliver your purchases to your home, which is useful because of the length of the drywall sheets. You can also save cash by renting many of these tools. Once you’ve made your purchase or rental, you can break your project down into three easy steps:
1. Cutting
Begin by laying your drywall sheets out on a level, dry surface. Measure the length you’ll need for your project, and use a pencil to mark where you’ll need to cut the sheet. Using a T-square as a guide, cut the sheet along the marks using a drywall saw. You can make most of your cuts before starting the project to ready your materials, or you can cut pieces as you work. The latter method results in fewer mistakes and less waste, but may take more time. A keyhole saw can be helpful for cutting spaces for electrical outlets and light switches, and a circle cutter is useful if you have curved spaces to work with.

2. Hanging
Start attaching your drywall sheets to the wood or metal studs used to frame your space. You should hang sheets horizontally when working with wood studs, while metal studs work better with vertical installations. This is because wood studs are more likely to warp and deflect over time. Hanging the sheet horizontally allows each sheet to be in contact with more studs and helps minimize deflection. Generally speaking, it can be more difficult to screw into metal studs. When using wood studs, you should also apply a drywall adhesive to the face of the studs before hanging your drywall in order to further minimize deflection. To attach the drywall to the studs, use a screw gun and drywall screws, making sure you hit the studs. Screws should be placed about every four inches.
Finally, you’ll tape, sand and finish the drywall. This involves applying three layers of mud, one layer of drywall tape, and a whole lot of sandpaper. First, use a 6-inch finishing knife to spread joint compound along each seam. This first layer is called the tape coat, and should be about four inches wide, centered on the joints in your drywall sheets. Next, apply drywall tape along the joints. The mud you applied will hold it in place. Your second coat of mud is called your block coat. Use your 6-inch finish knife to apply a second coat of mud on top of your drywall tape. Use just enough to seal the drywall tape in place. The final coat is called the skim coat. A 10-or 12-inch knife should be used to apply a third coat of mud. Take your time on this coat to spread the mud thinly away from the seams to provide a smooth, level surface.
Use a pole sander and 120-grit sandpaper to lightly sand the mud you applied earlier. You’ve finished sanding when you can’t see any tape or mud bulges on the walls’ surface, and when a level applied to the wall shows it is smooth and even. Wear a mask and goggles while sanding to prevent damage to eyes and lungs.
Sometimes drywall will become damaged due to impact from people or objects. This damage is simple to repair, and simply involves filling any holes, then covering them with mud and sanding them so they are smooth and flush with the rest of the wall. For larger holes, cut out a piece of drywall that will roughly fill the hole, then fill the rest of the space with mud. For smaller holes or dings, mud can be used on its own to fill in the damaged area. After you’ve filled the hole, use a single coat of mud and sand as usual.
Installing your own drywall ceiling
